Online With Certificates Contouring Course: Have you ever wondered how professional makeup artists achieve flawless contouring? Well, the theory that practice makes perfect certainly holds true in the world of contouring.
And if you’re looking to take your contouring skills to the next level, then the Online With Certificates Professional Contouring Course is the ultimate training you’ve been searching for. With a comprehensive curriculum that covers essential techniques, advanced methods, and even mastering contouring for different face shapes, this course is designed to elevate you into the realm of contouring experts.
But that’s not all – the course also includes professional tips and tricks that will leave you eager to discover the secrets of achieving that perfectly sculpted look.
So, are you ready to unlock your true contouring potential?
Online With Certificates Contouring Course: Course Overview
Welcome to the Course Overview for our Contouring Course, designed specifically for contouring experts like you. In this course, we’ll delve deep into the art of contouring, equipping you with the knowledge and skills to take your expertise to the next level.
One of the key benefits of this course is that it provides you with a comprehensive understanding of the latest contouring techniques and trends. We’ll explore innovative approaches to contouring that will set you apart from the crowd and keep you at the forefront of the industry.
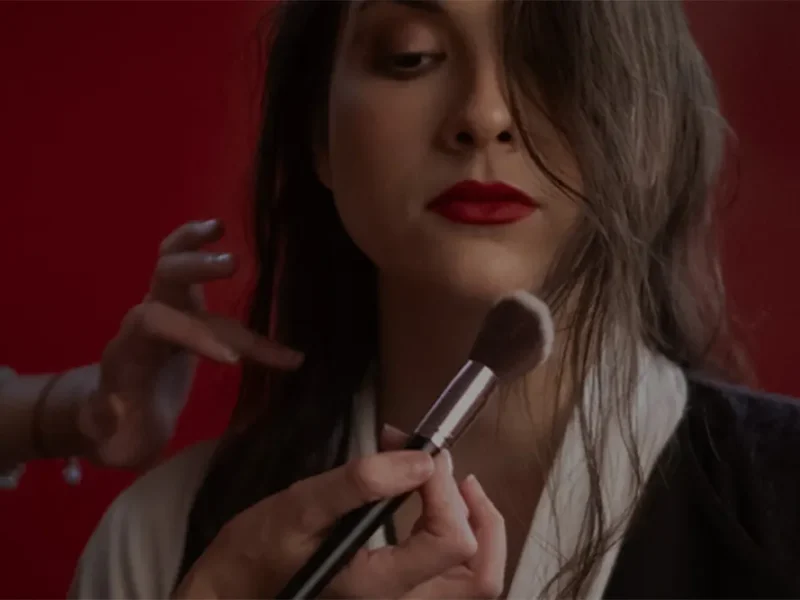
To ensure that you have the right tools for the job, we’ll also cover the essential contouring tools in detail. From brushes to creams, you’ll learn how to select and use the best products for different face shapes and desired effects. Our expert instructors will guide you through the process, sharing their insider tips and tricks along the way.
Online With Certificates Contouring Course: Essential Contouring Techniques
Now, let’s dive into the essential contouring techniques that will elevate your expertise to new heights.
As a contouring expert, you understand the importance of highlighting techniques and using the right contouring tools to achieve flawless results.
Highlighting techniques play a crucial role in contouring. By strategically applying lighter shades to certain areas of the face, you can enhance features and create a more sculpted look. One popular highlighting technique is the triangle method, where you apply a lighter shade in a triangular shape under the eyes, down the bridge of the nose, and on the center of the forehead. This technique helps to brighten and lift the face.
In addition to highlighting techniques, having the right contouring tools is essential for achieving professional results. A contouring brush is a must-have tool for blending and sculpting. Look for a brush with dense bristles that will allow for precise application and seamless blending. Another important tool is a contouring palette that includes a range of shades to match different skin tones. This will ensure that you have the right colors to create natural-looking shadows and highlights.
Advanced Contouring Methods

To take your contouring skills to the next level, explore advanced methods that will elevate your expertise and allow you to achieve even more stunning and transformative results.
When it comes to advanced contouring, one of the key techniques to master is advanced highlighting. This technique involves strategically placing lighter shades of makeup on specific areas of the face to create a three-dimensional effect and enhance the natural features. By mastering advanced highlighting techniques, you can add depth and dimension to your contouring, resulting in a more sculpted and defined look.
In addition to mastering advanced highlighting techniques, it’s also important to invest in advanced contouring tools. These tools are specifically designed to help you achieve precise and seamless contouring. From contouring palettes with a range of shades to contouring brushes with angled bristles, these tools can make a world of difference in your contouring game. They allow for better control and precision, enabling you to create more intricate and detailed contouring effects.
Mastering Contouring for Different Face Shapes
As you continue to refine your contouring skills and explore advanced methods such as advanced highlighting, it’s crucial to also understand the importance of mastering contouring techniques for different face shapes. Face sculpting is an art, and just like any artist, you need to understand the canvas you’re working on. Each face shape requires different shading techniques to achieve the desired effect.
For those with round faces, contouring can help create the illusion of more defined cheekbones. By using a darker shade to contour the hollows of the cheeks and a lighter shade to highlight the high points, you can create the appearance of a slimmer face.
If you have a square face shape, contouring can help soften the angles and create a more oval appearance. Focus on contouring the outer edges of the face and the jawline to create a more rounded look.
For those with heart-shaped faces, contouring can help balance out the wider forehead and narrower chin. Focus on shading the temples and the sides of the forehead, while highlighting the center of the face and the chin.
Lastly, if you have an oval face shape, consider yourself lucky as this is the most versatile face shape for contouring. You can experiment with different shading techniques to enhance your natural features and create various looks.
Professional Tips and Tricks
Enhance your contouring skills with these expert tips and tricks. To achieve flawless contouring, it’s essential to master the art of highlighting and blending.
Start by investing in high-quality highlighting products. Look for ones that have a creamy consistency and a shade that complements your skin tone. Cream-based products blend seamlessly into the skin, giving you a natural-looking glow.
When it comes to blending, the key is to use the right tools and techniques. Opt for a damp beauty sponge or a fluffy brush to blend the contour and highlight products. The dampness of the sponge helps to create a smoother finish, while a fluffy brush ensures a seamless blend.
To achieve a more sculpted look, apply the contour product in the hollows of your cheeks, along the jawline, and on the sides of your nose. Remember to blend it well to avoid harsh lines.
For a more lifted appearance, apply the highlighter on the high points of your face, such as your cheekbones, the bridge of your nose, and the cupid’s bow.
Experiment with different blending techniques, such as stippling, buffing, or tapping motions, to find the one that works best for you. Remember to blend in a gentle, circular motion, starting from the center of your face and working outward.